How did we get here?
I have never been one to dive into electronics with any certainty or indeed any confidence. This is probably because I have never had any formal training, nor have I been shown the basics beyond “battery to Resistor to LED to battery” – Well done, you made a circuit!
Last year this began to change. I had messed with guitar wiring in so far as I’d changed the pickups out of various guitars about 10 times and learned how to add shed loads more solder than I needed to, but I was gaining a little confidence. I decided to modify some guitar pedals.
I started with my favourite overdrive pedal, the Ibanez TS-9 Tubescreamer. It had been a mainstay of my pedal board since I bought my first Marshall and hadn’t disappeared, I’d even had 2 on the same board at multiple times. So I wanted to see what the fuss was about modified versions. I found a donor pedal for relatively cheap and bought a kit off Ebay and set off on my pedal modifying adventure.
Beginning the TS-9 Transformation…
TS9 all soldered up…
Okay, so in total there were probably less than 10 parts to change, but the results were drastic. It was also an eye-opening experience just how adept I had become at using a soldering iron and understanding the methodology in adapting a schematic.
I had my original TS-9 laying around so decided to put a quick demonstration video together of them side by side. The kit I used was called “Mastertone Mod Kit”.
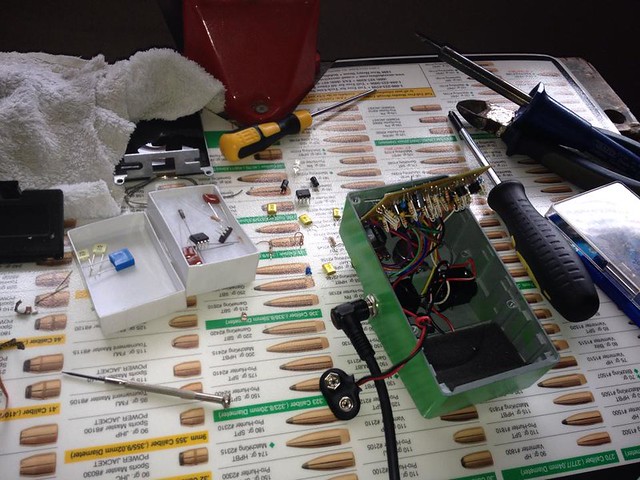
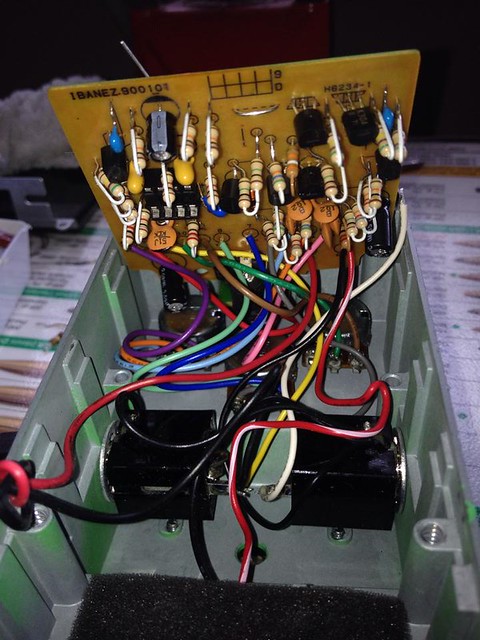
Following on from my success with the TS-9, I looked into other pedal builders and modifiers and came across “Fuzz Dog’s Pedal Parts” – which at the time was called “Poodle Pedal Parts”. After reading up on the benefits of True Bypass vs. Buffers from the “Holy Grail Man” of Pedal Board builders Pete Cornish; I decided that since a lot of my pedals were going True Bypass I should add a buffer. But what if I had one for the start of my FX chain, and one at the end, so I have a continuous level throughout.
Thus my Double-Buff pedal was born.
Utilising 2 “cream” buff boards in a single enclosure I put both circuits back together and added a pedal board junction box to my pedal board. This involved, for the first time, working on a clean PCB and a little bit of figuring out for myself. It came fairly easily at this point and I decided, rather abruptly that I wanted to build an amplifier. A full tube amplifier. Something small would not suffice, if I was to do it, I was going to do it right. A Marshall JTM-45. The iconic “Rock” amp.
Where to start?
I decided that if I was to do this, at some point I WOULD require help, so rather than looking to Ceriatone in USA, or some other large outfit that are hundreds of miles away, I had seen a local Amp Builder who had been producing some mighty fine looking amplifiers, neat and knew what he was talking about. previous Blackstar Amp Technician Eli Abbott.
I fired a few emails back and forth with Eli and although he doesn’t normally do it, he agreed to put me a “kit” together of the parts and schematic he uses to build his own JTM-45 clone. Very friendly and personable and never unwilling to offer advice and help. Vetting the supplier and finding one of this calibre was invaluable.
We agreed a price, and within little time Eli had sourced the parts needed for my build and packaged them up to send directly to me. Here’s the pre-package photo he sent me;
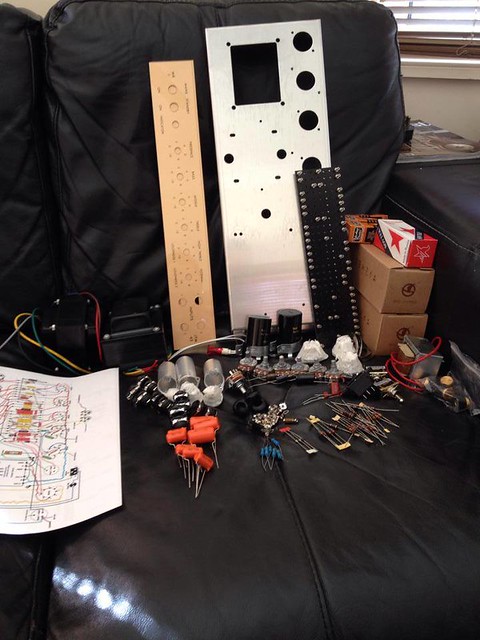
Pre-Packaged Parts
It wasn’t long (but felt like forever as I was itching to burn my fingertips!) before I had the parts sitting and waiting for me on my doorstep ready to get started.
I’d been sent a familiar schematic, since I had been looking into the builders and the kits available what Eli sent through looked like one I had seen before, but it had a few tweaks for the kit that Eli had sent through.

JTM 45 Schematic
Diving Straight in…
I set about installing things on the chassis. It should be noted, if I did this again from scratch I would do the process in a slightly different order, but based on no experience and a ‘bull in a china shop’ attitude to jumping straight in, this order sufficed.
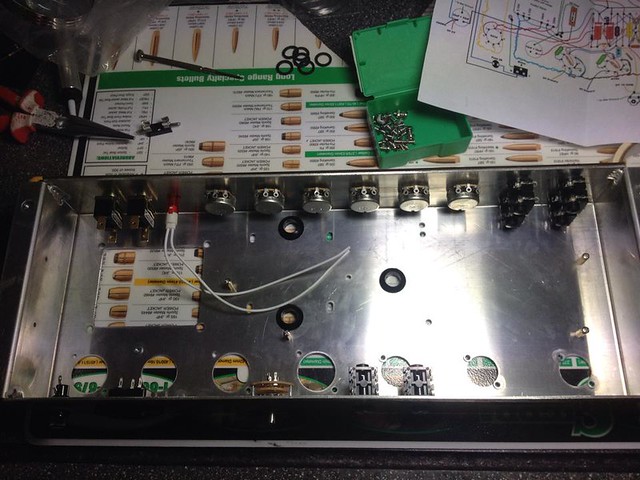
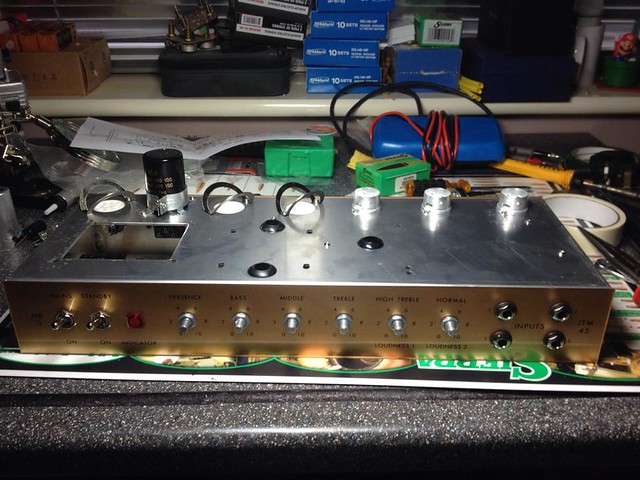
Adding fascia and components.
Fascias, Switches, Pots, Jacks, LED, Grommets, Fuse, Power socket and impedance selectors installed..
Next up Valve bases electrolytic capacitors…
More components added…
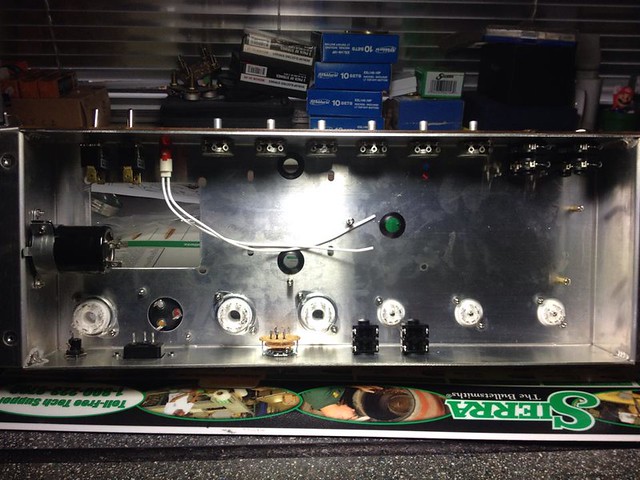
Almost looks like an amp from the outside.
Time To Start Wiring…
Until this point, I’d never really fully utilised heat shrink and I was embarking on an adventure as to the sheer magnitude of wiring that would need to be accomplished in order to complete this build. Alas, this is no time to doubt ones self. Bull-headed “what could go wrong” attitude to the rescue and I pushed forwards.
Started Wiring
It was going well, a few incidents with wiring things up the wrong way, but overall very positive.
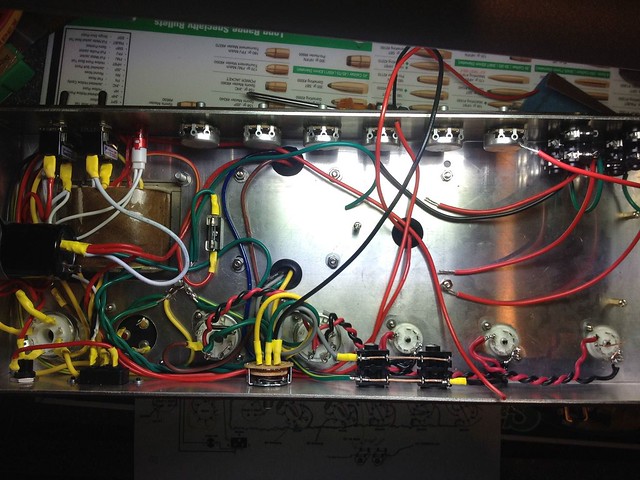
I’d got the power transformer installed along with wiring up most of the power side of the amp. Heaters on the valves and rectifier valve wired up. It wasn’t a complete mess in there… I’d also got the Fuses and grounds wired up along with output transformer, Impedance switch and choke.
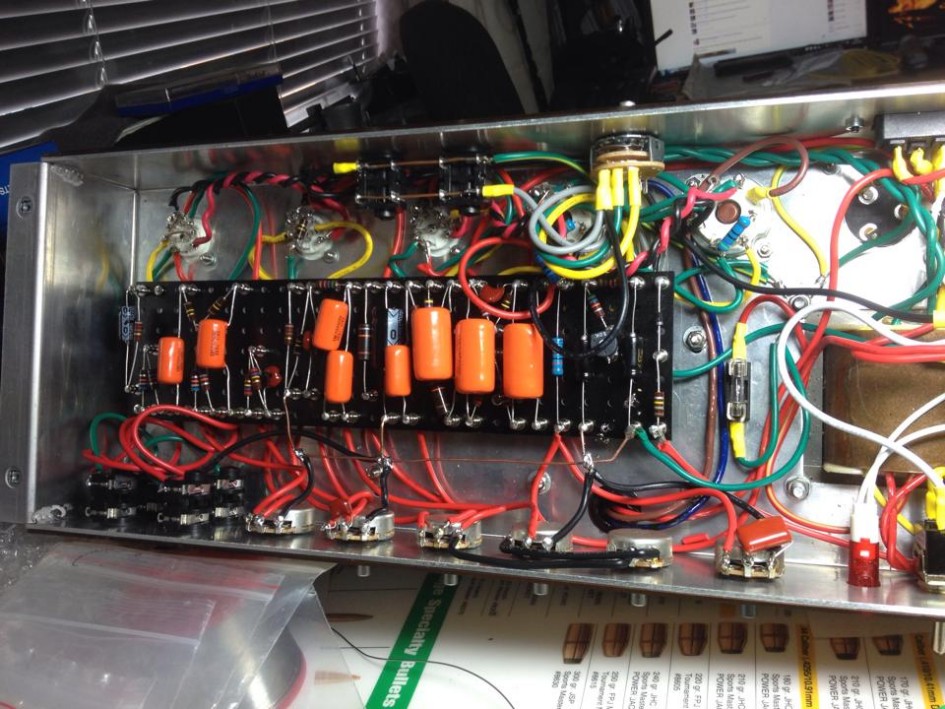
Pretty much all of the ground work inside the chassis was done, as far as I’m concerned. Onto the turret board.
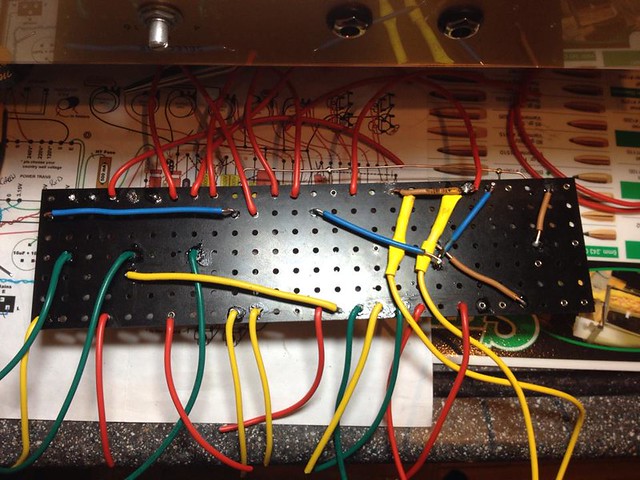
Turret Board Creation
I’d pretty much dreaded this part of the build as it was the most complex part. The bit where I had to marry the correct components is sertraline a generic xanax from the diagram to the correct terminals on the board. Luckily the turret board I received from Eli already had the turrets mounted in the correct positions and all I had to do was read the resistor values and place them in the correct place.
The most tedious part of this was sorting out the resistors into their correct values, which took a night in itself.
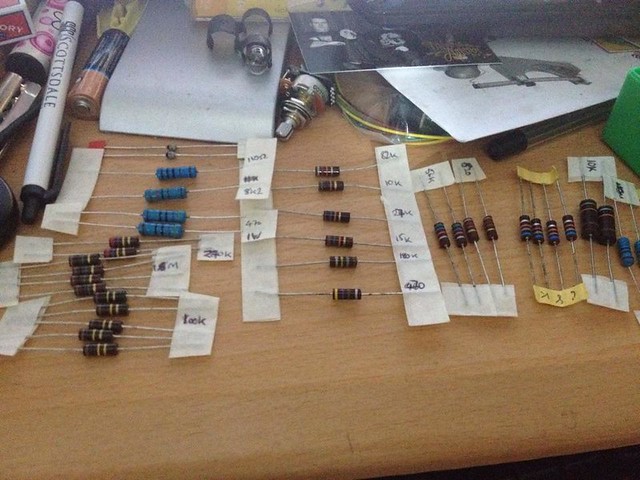
Sorted Resistors
Once I had sorted the resistors into their correct values the next part of the plan was to lay out the resistors in their positions on the turret board in order to see where they all go before soldering stuff in the wrong place. I actually found this part of the process completely therapeutic and definitely want to do it again!
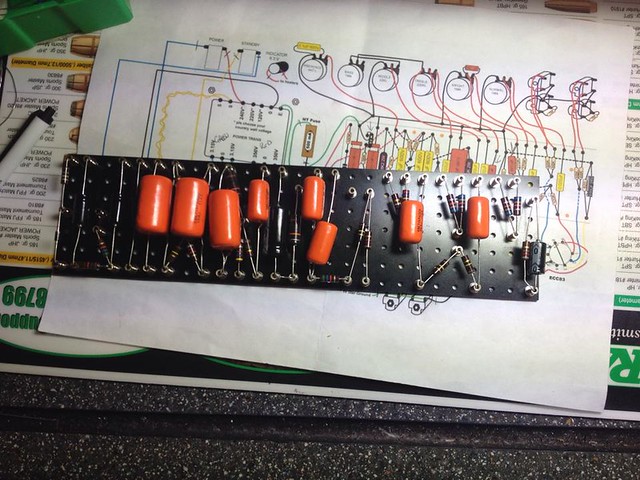
Parts on Turret Board
After checking and double checking I couldn’t wait to start hitting the turrets with solder. I think this may have been my favourite part of the whole build!
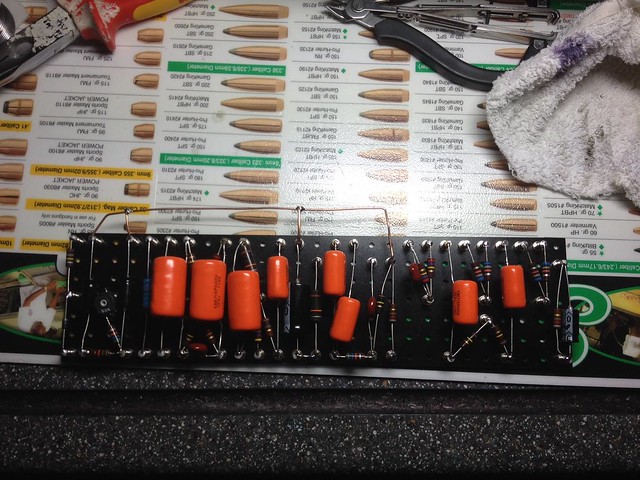
Isn’t it beautiful…
It’s not as neat as some of the builds that get posted in my feed on facebook from various people, but for a first attempt I was smitten with my work!
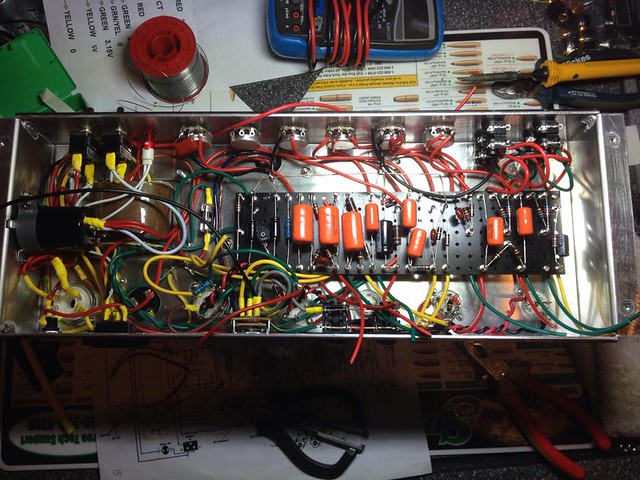
Onto the underside. I have to admit, this side was completely alien to me. Not knowing how long the wires had to be cut, and then trying to solder in to turrets with nothing to heat on the same side of the board. Note to self. Complete underside wiring before adding components!
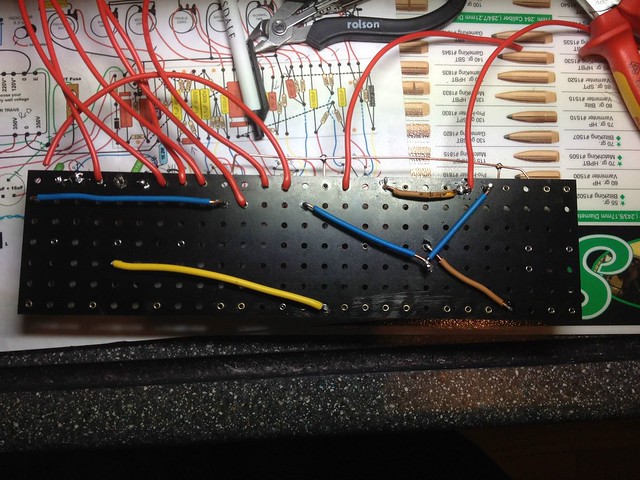
Half completed underside
Completed wiring underside
Clearly my lack of experience led me to some questionable looking wiring on the underside of this board. Luckily for me it will never be seen as it is on the underside.
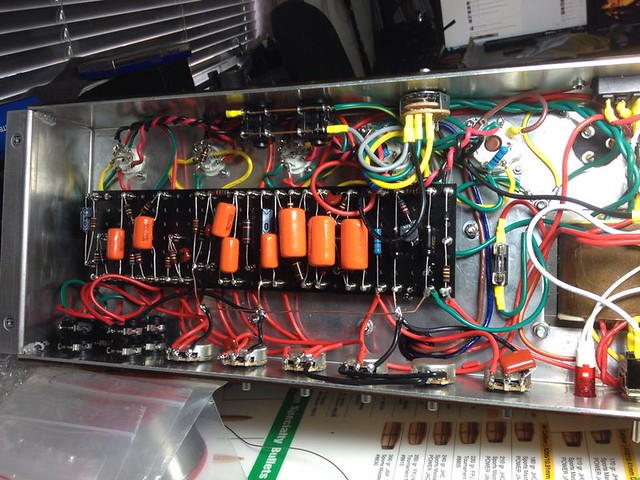
Mating Turret with Chassis
See, she still looks good in situ!
All Wired Up…
Almost There…
Everything Connected to everything else. The only thing left to do is plug in the Tubes, Check the Biasing and Turn it up!
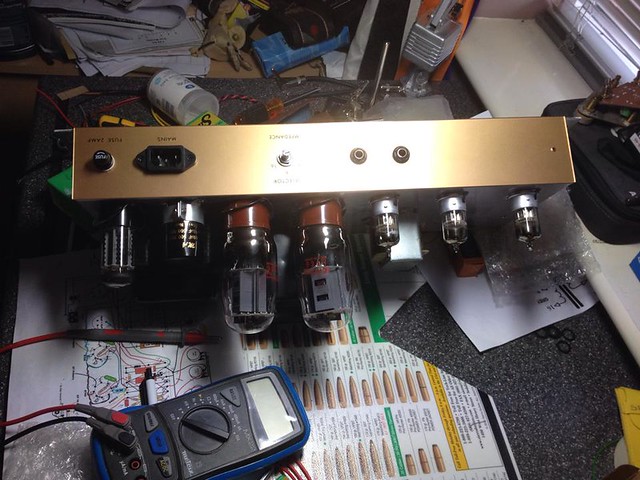
Tubes In…
This is where I ran into major trouble, and the exact reason that I knew going for someone relatively local would be a much better fit in the long run. I’m glad that I talked through with Eli in the beginning that I would need help throughout the process because I had a 99% completed amp which wasn’t working and absolutely ZERO idea how to troubleshoot.
The Bias reading was extremely high, way too high to be right. I had no idea where to look as the bias pot in the original schematic wasn’t working at least as much as I could tell it wasn’t making a blind bit of difference. After talking to Eli back and forth for a couple of hours he agreed to let me bring it over to him and take a look. This way I could see how he troubleshoots and learn some valuable skills and also not bug him with back and forth emails for the next 2 weeks trying to sort it out.
To The Master…
I jumped in the car and headed for Wellingborough.
A few hours after arriving, trying various troubleshooting methods, rewiring some of my badly soldered jacks and “chopsticking” my amp, we (Eli) found that I had missed a lead off the turret board, which is why the bias voltage was not being regulated as it was completely cut out of the circuit. Nice.
The KT66 valves I had were faulty.
And a wire from the transformer I was told verbally to cut and fold back on itself had been done to the wrong wire and was feeding 50 volts straight out via ground which was causing a hum. Oops!
All of this sorted and the amp worked and sounded great!
I didn’t have replacement KT66 tubes to hand, but luckily 6L6 tubes work great in this amp, and since I have a Mesa Boogie amp as my main gigging amp that uses the same tubes it is like mixing my 2 familiar amp sounds into one great amp. Marvellous!
How Long Did All This Take?
Total build time was in the region of 40 hours and it took me 2 weeks to fit them all in. Not too shabby for a first attempt.
I was really lucky to have a hand from the guy who builds them for a living multiple times throughout the build, when I was questioning myself and my knowledge of the diagram, and then again especially at the end.
I’m certain I would have been going round and round for weeks with some of that!
Thank you Eli.
What’s Next?
Well shortly after completing the electronic side of the build I was inspired by the Exotic Custom Mesa Boogie Amplifiers to build a really snazzy head and cabinet box for the amp.
I have the speaker (Celestion Creamback 65w) and I have sourced some really nice Ripple Sycamore Timber to put together and build a really nice cabinet, but unfortunately, like Electronics was at the start of this project, I do not have the confidence, nor the experience to risk butchering the £200+ timber that I have sourced. I need a good carpenter to take me under their wing and show me the techniques I need to build something that will last a lifetime.
Watch This Space…
Leave a Reply